


The short answer
Adding continuous exterior insulation to a North Shore home during a re-clad or envelope upgrade costs $18 to $35 per square foot of wall area in 2026, on top of whatever the cladding and rainscreen cavity themselves cost. Most of that premium is labour and the deeper trim, window, and flashing details the extra thickness requires, not the insulation material itself. On a project already targeting a BC Energy Step Code performance level, continuous exterior insulation is usually the single most effective square-foot investment for closing the gap between a house's current performance and the target step, because it covers the wood studs that insulation inside the wall cavity cannot reach.
Two different layers, and where each one sits in the wall
Picture the wall from the inside out: framing, sheathing, then the water-resistive barrier, then an air cavity, then the cladding. The rainscreen cavity, the 10 millimetre drained and vented gap required since December 2006 on most BC coastal permits, sits between the water-resistive barrier and the cladding. Its job is drainage and drying, keeping water that gets past the siding from sitting against the sheathing.
Continuous exterior insulation is a separate layer of rigid foam or mineral wool board, installed against the sheathing, underneath the water-resistive barrier and the rainscreen cavity. Its job is thermal performance: it covers the wood studs, which conduct heat far faster than the insulation batts sitting between them, so a house with only cavity insulation loses a meaningful amount of heat straight through the framing itself, an effect called thermal bridging.
A project can build a rainscreen cavity without adding exterior insulation, and older BC houses commonly do, cladding, cavity, sheathing, studs with insulation between them, done. Adding the exterior insulation layer on top of that assembly is the upgrade this article is about, and it only makes sense to price and plan at the same time as a re-clad or rainscreen retrofit, because removing cladding twice to add insulation later costs far more than doing both in one pass.
What continuous exterior insulation costs in 2026
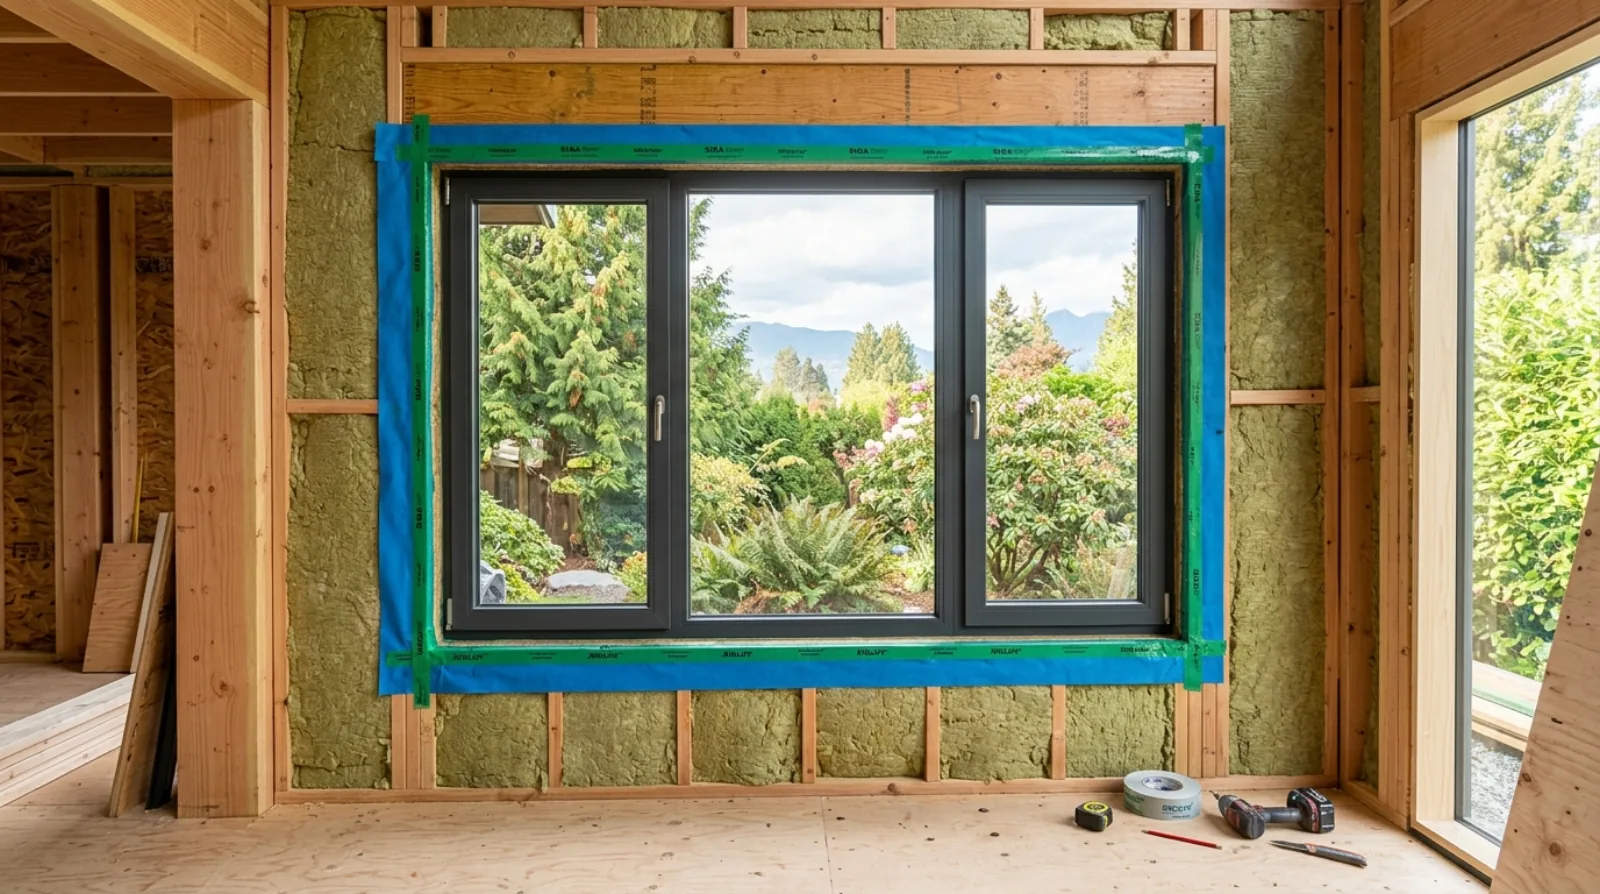
Adding continuous exterior insulation during a re-clad or envelope upgrade runs $18 to $35 per square foot of wall area in 2026 on the North Shore, on top of the cladding and rainscreen cavity cost covered in our siding replacement guide. The material itself, rigid mineral wool or rigid foam board, is a modest share of that number. The rest is labour and the secondary details the added thickness forces: every window and door needs deeper extension jambs, every piece of trim moves outward, corner and transition flashing has to be redesigned for the new wall depth, and fasteners through to the framing need to be longer and rated for the load.
The thickness chosen drives cost more than the material choice does. A 25 to 38 millimetre layer, common where the goal is meeting a Step Code target without major dimensional changes, sits toward the lower end of the range. A 50 to 100 millimetre layer, used where a project is chasing a higher Step Code level or a Passive House-style performance target, sits toward the upper end and adds noticeably more to window and door detailing.
The other cost driver is what stucco or panel cladding does to the number compared with lighter siding. A stucco or exterior insulation and finish system-style assembly, where a base coat and a textured finish are applied directly over the rigid insulation with reinforcing mesh embedded in it, adds its own labour cost for the multi-coat application on top of the insulation and cavity work, generally landing at the higher end of cladding options on a North Shore project.
| Insulation thickness | Typical use case | Added cost, per sq ft of wall |
|---|---|---|
| 25 to 38 mm | Meeting a moderate Step Code target without major trim changes | $18 to $24 |
| 50 mm | A stronger Step Code target, or an older house with poor wall insulation | $24 to $30 |
| 75 to 100 mm | Deep energy retrofit or Passive House-style target | $30 to $35+ |
| Stucco or panel finish over insulation | Multi-coat applied finish directly on the insulation layer | Add $8 to $15 to the above, for the finish coats and mesh |
How this interacts with the BC Energy Step Code
The BC Energy Step Code sets performance-based energy targets for new construction and major renovations, measured by how well the whole building performs, not by a checklist of individual products. A house can meet a given step through several combinations of insulation, air tightness, windows, and mechanical systems, and continuous exterior insulation is one of the more efficient ways to move that overall number because of where it sits in the wall.
Cavity insulation, the batts or blown-in material between the studs, gets interrupted by every single stud, top plate, and header in the wall, and wood conducts heat several times faster than the insulation around it. That thermal bridging effect means a wall rated on paper at a certain R-value based on the cavity insulation alone actually performs lower in practice, once the framing's heat loss is averaged in. Continuous exterior insulation sits outside all of that framing, covering it completely, which is why a modest thickness of exterior insulation often closes more of the gap to a Step Code target than adding the same dollar amount of cavity insulation would.
For a renovation triggering a building permit, only the new or altered portion of the building generally has to meet current energy code, which in North Vancouver and West Vancouver means a Step Code level set by each municipality's adopted bylaw. Whether the whole home needs to comply or just the addition depends on the scope and the specific municipal bylaw in effect, so confirming the applicable step and whether the existing walls are captured is a building department question to ask before finalizing the insulation thickness, not an assumption to build the quote around.
Where a project is already re-cladding a wall for other reasons, envelope failure, an outdated rainscreen assembly, a cosmetic update, the marginal cost of adding exterior insulation at the same time is far lower than adding it as a standalone project later, since the cladding removal and the window and trim adjustments are already part of the scope either way.
Moisture management: the part that actually matters on the North Shore
Vancouver's coastal weather is the reason BC has the strictest residential wall requirements in the country, and adding a layer of exterior insulation changes the moisture physics of the wall in ways that have to be managed deliberately rather than assumed to work themselves out.
The water-resistive barrier, the layer that actually keeps bulk water out of the wall, has to be installed correctly relative to the insulation. Depending on the specific insulation product and system, the barrier is either applied directly to the sheathing before the insulation goes up, or it is a facing integrated into the insulation board itself. Either way, every seam has to be lapped correctly and sealed, because a barrier installed out of sequence with the insulation layer is one of the more common defects we see on poorly executed exterior insulation retrofits.
The rainscreen cavity still sits outside the insulation, between it and the cladding, and it still needs its 10 millimetre minimum gap, drainage openings at the base, and venting at the top, exactly as described in our rainscreen guide. Adding exterior insulation does not remove the need for that cavity. If anything, it raises the stakes of getting the cavity right, since the insulation layer beneath it is harder and more expensive to dry out if water gets trapped against it than bare sheathing would be.
The colder outer face of the sheathing, now on the inside of the new insulation layer rather than exposed directly to outdoor temperature, changes where condensation risk concentrates within the assembly. This is a detail worth having reviewed by whoever is designing the wall assembly, particularly on a house also adding cavity insulation or upgrading air sealing at the same time, since stacking multiple envelope upgrades changes the vapour drive through the wall in ways a single upgrade alone would not.
- Confirm whether the water-resistive barrier is applied to the sheathing before the insulation or integrated into the insulation product, and follow that system's sequence exactly.
- Keep the rainscreen cavity's minimum 10 mm gap, base drainage, and top venting outside the insulation layer, unchanged from a standard rainscreen wall.
- Have window and door extension jambs, sill pans, and head flashing redesigned for the added wall depth rather than shimmed to fit.
- Use fasteners rated for the added thickness and load, reaching solidly into the framing behind the insulation.
- Review vapour drive with whoever designs the assembly if cavity insulation or air sealing upgrades are happening in the same project.
Where this makes sense, and where it does not pay off
Exterior insulation earns its cost most clearly on a house that is already having its cladding removed for another reason. A 1970s or 80s North Shore home due for a re-clad because the original rainscreen assembly is failing, or because the siding itself is at the end of its life, is the textbook case: the cladding is coming off regardless, the trim and window details are already being touched, and the marginal cost of adding the insulation layer is a fraction of what it would cost as a standalone project.
It makes less sense on a house with cladding still in good condition and no other envelope work planned, since stripping functional siding purely to add exterior insulation rarely pencils out against the energy savings on its own, outside of a project specifically targeting a deep energy retrofit or a Step Code level that requires it.
It is also worth weighing against interior options where dimensional changes outside are a problem, heritage character homes with protected street-facing details, or lots where the setback is already tight to the property line. Interior-side continuous insulation exists as an alternative, though it comes with its own vapour and detailing considerations and generally disrupts finished interior space in a way exterior insulation does not.
Sources
Frequently asked questions
What does adding exterior insulation cost on a North Shore home in 2026?
Continuous exterior insulation added during a re-clad or envelope upgrade runs $18 to $35 per square foot of wall area in 2026, on top of the cladding and rainscreen cavity cost. Most of that cost is labour and the deeper window, door, and trim details the added thickness requires, rather than the insulation material itself, and the range moves higher with thicker insulation or a stucco-style applied finish.
Is exterior insulation the same thing as a rainscreen?
No. The rainscreen is a drained and vented cavity, minimum 10 millimetres, required on most BC coastal building permits since December 2006, sitting between the water-resistive barrier and the cladding to manage drainage and drying. Exterior insulation is a separate rigid insulation layer installed against the sheathing, underneath that cavity, added specifically for thermal performance. A wall can have a rainscreen cavity with no exterior insulation at all, which describes most older North Shore re-clad jobs.
Why does exterior insulation help more than adding insulation inside the wall cavity?
Because cavity insulation is interrupted by every stud, top plate, and header, and wood conducts heat several times faster than the insulation around it, an effect called thermal bridging. Exterior insulation sits outside all of the framing and covers it completely, so it closes more of the gap to a given energy performance target per dollar spent than adding the same amount of cavity insulation, which still has to work around the studs.
Does exterior insulation help meet the BC Energy Step Code?
Yes, and it is often one of the more efficient ways to close the gap to a given step, since it addresses thermal bridging through the framing that cavity insulation cannot reach. Whether the requirement applies to just a new addition or to the whole house depends on the project's scope and the specific Step Code level each municipality has adopted, so confirm the applicable requirement with the City or District of North Vancouver or West Vancouver building department before finalizing the insulation thickness.
What thickness of exterior insulation is typical on a North Shore project?
25 to 38 millimetres is common where the goal is meeting a moderate Step Code target without major changes to window and trim depth. 50 millimetres suits a stronger target or a house with poor existing wall insulation. 75 to 100 millimetres is used on deep energy retrofits or Passive House-style targets, and it adds noticeably more cost to window and door detailing because of the added wall depth.
Does adding exterior insulation increase moisture risk on a North Shore house?
It changes where condensation risk concentrates within the wall assembly, since the sheathing sits on the warmer, inside face of the new insulation layer rather than being exposed directly to outdoor temperature. Managed correctly, with the water-resistive barrier sequenced properly relative to the insulation and the rainscreen cavity maintained outside it, the risk is controlled. It is a detail worth having reviewed by whoever designs the wall assembly, especially if cavity insulation or air sealing is being upgraded in the same project.
Should I add exterior insulation if my siding is still in good condition?
Usually not on its own. Stripping functional cladding purely to add exterior insulation rarely pays off against the energy savings alone, outside of a project specifically targeting a deep energy retrofit or a Step Code level requiring it. The math changes completely once cladding is already coming off for another reason, since the removal and trim adjustments are already part of the project scope.
What is an exterior insulation and finish system?
It is a stucco-style wall assembly where a base coat and a textured finish coat are applied directly over rigid exterior insulation, with reinforcing mesh embedded in the base coat. On a North Shore project it generally sits at the higher end of cladding cost options because of the multi-coat labour involved, and it depends on the same rainscreen cavity and moisture management principles as any other cladding over exterior insulation.
Can exterior insulation be added without replacing the siding?
Not in any practical sense on an existing wall, since the insulation installs against the sheathing, underneath the cladding, which means removing the existing siding to add it. This is why exterior insulation is almost always planned alongside a re-clad or envelope upgrade rather than as an independent project against cladding that is staying in place.
Does exterior insulation affect window and door installation?
Yes, and it is one of the larger hidden costs in the per-square-foot number. Adding thickness to the wall means every window and door needs deeper extension jambs, sill pans, and head flashing redesigned for the new depth rather than shimmed to fit the old dimensions. This detailing work, not the insulation material, is what pushes exterior insulation retrofits toward the higher end of their cost range.
Is interior insulation a better option than exterior insulation on a character home?
It can be, specifically where exterior dimensional changes are a problem, such as a protected street-facing heritage elevation or a lot with a tight property line setback. Interior-side continuous insulation avoids changing the exterior wall depth, but it comes with its own vapour management considerations and disrupts finished interior space in a way exterior insulation does not, so the choice depends on which constraint matters more for that specific house.
Related service
Home renovation
See how we handle home renovation projects across the North Shore.
Learn about home renovationWhere this applies
Related articles