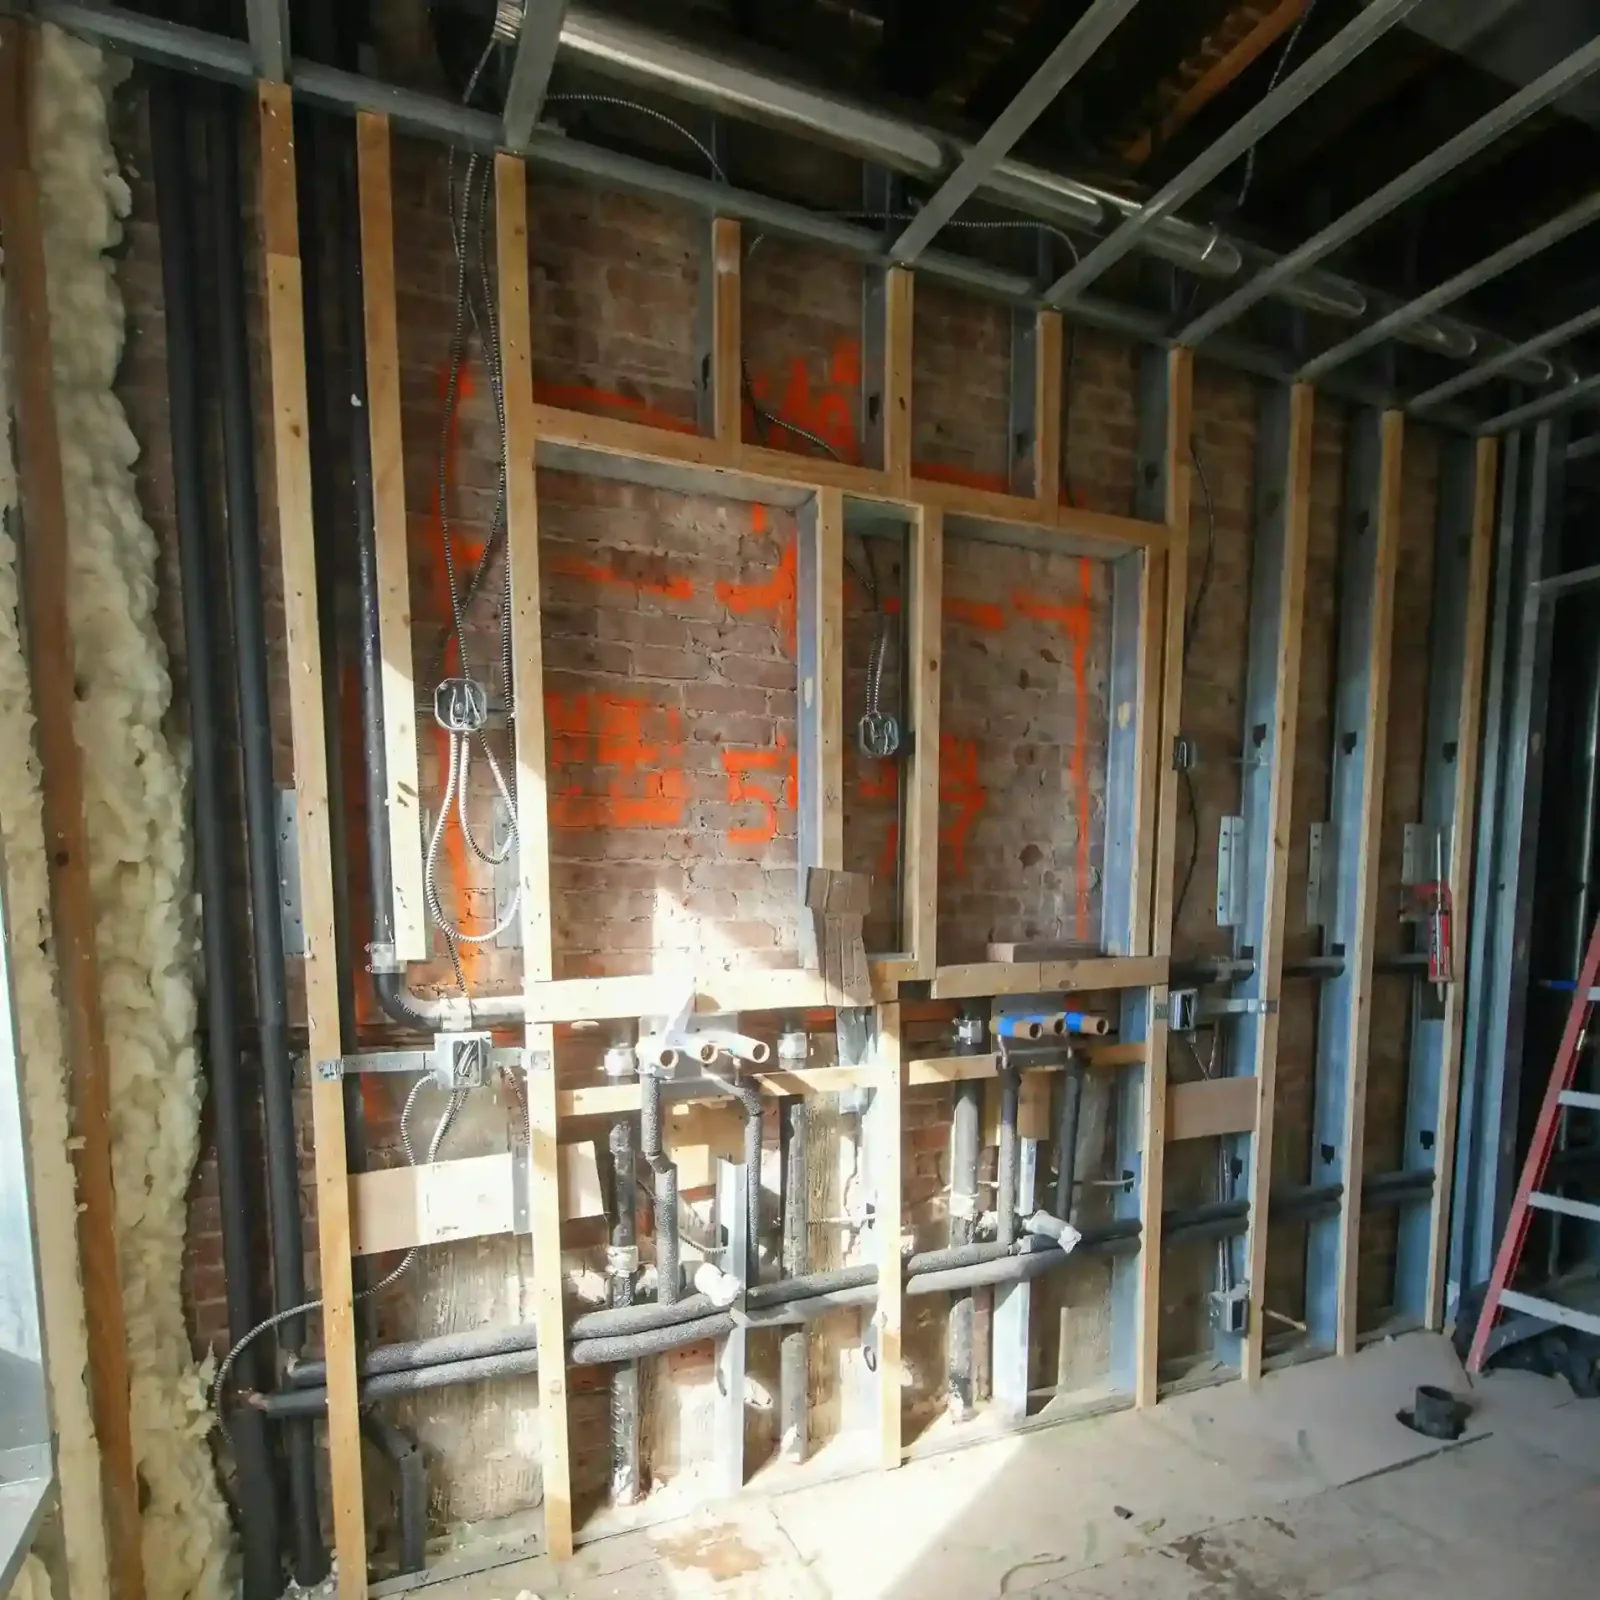









The short answer
BC Building Code Article 9.25.4.2 requires a vapour barrier on the warm side of the insulation in nearly every wall, ceiling, and floor assembly, with a permeance not greater than 60 nanograms per pascal-second-square metre. On the North Shore, where outdoor air carries more moisture than most of Canada for months at a time, the warm side is almost always the interior side, which is why the poly sheet goes between the drywall and the insulation, never on the exterior sheathing.
What a vapour barrier actually does
Water vapour is water in gas form. It travels invisibly through the air, and warm air holds far more of it than cold air does. Inside a house, showers, cooking, breathing, and houseplants all add vapour to the indoor air, and that moist air is constantly trying to move toward the drier, colder air outside, passing straight through most building materials to get there.
When that moving vapour hits a cold surface, it turns back into liquid water. That is condensation, the same thing that beads on a cold drink in summer. Inside a wall, the cold surface is usually the back of the exterior sheathing in winter, and condensation there means the wood framing and insulation next to it get wet, again and again, all winter long.
A vapour barrier is a material that blocks most of that vapour from moving through it. BC Building Code Article 9.25.4.2 sets the standard: a vapour barrier must have a permeance not greater than 60 nanograms per pascal-second-square metre, tested by a standard method called the desiccant method. That number describes how little water vapour the material lets pass. Polyethylene sheet, the clear or milky plastic film stapled up before drywall, easily beats that number, which is why it is the standard vapour barrier material on almost every North Shore house.
The purpose is simple even though the physics sounds technical: stop the vapour before it reaches the cold surface, so the cold surface stays dry.
Why the poly goes on the warm side
Article 9.25.4.2 requires the vapour barrier to be located so that it is on the warm side of the point in the assembly where condensation would occur, which in nearly every North Shore climate application means the interior side of the insulation, right behind the drywall. Warm side means the side of the wall assembly closer to the heated interior of the house, where the air is warmer and carries more vapour before it has cooled.
Picture a standard exterior wall built from the outside in: siding, sheathing, insulation, vapour barrier, drywall. The vapour barrier sits between the insulation and the drywall, close to the warm interior. Its job is to catch the vapour before it can travel through the insulation and reach the cold sheathing on the far side.
Put the vapour barrier on the wrong side, sealed to the exterior sheathing instead of the interior drywall, and it traps vapour on the cold side of the insulation instead of stopping it before it gets there. That is one of the most damaging mistakes we see corrected during a North Shore renovation, usually inherited from a previous owner's DIY work or an older code edition that was interpreted incorrectly.
A vapour barrier only works where there is insulation for it to protect. Article 9.25.4.1 ties the requirement to assemblies where insulation is present, so an uninsulated garage wall or an unheated shed has no vapour barrier requirement in the first place, because there is no warm-to-cold temperature difference across it worth protecting against.
| Layer | Position | Function |
|---|---|---|
| Siding or cladding | Exterior face | Sheds bulk rainwater |
| Weather-resistive barrier / rainscreen | Behind cladding, over sheathing | Manages the water that gets past the siding |
| Sheathing | Structural layer | Coldest solid surface in the assembly in winter |
| Insulation | Between studs | Slows heat loss, the layer the vapour barrier protects |
| Vapour barrier (poly, 6 mil / 0.15 mm typical) | Warm side of insulation, behind drywall | Blocks vapour before it reaches the cold sheathing |
| Drywall | Interior face | Finished interior surface |
Why this matters more here than almost anywhere else in Canada
The North Shore sits in a coastal climate where outdoor humidity stays high for most of the year, not just during a few wet weeks. Vancouver's North Shore gets more annual rainfall than nearly any other major Canadian metro area, and that moisture load in the outdoor air changes how forgiving a wall assembly can afford to be with a vapour barrier mistake.
In a dry interior climate, a wall with a slightly wrong vapour barrier position might dry out during a long stretch of dry weather before real damage sets in. On the North Shore, the outdoor air rarely gives a wall assembly that dry stretch. A mistake made in October can still be actively wetting the same stud cavity in April, because the drying window never really opens.
This is also why mould shows up behind walls here that look completely fine from the room side. The drywall paint job can be five years old and immaculate while the cavity behind it has been condensing and re-wetting all winter, every winter, because nobody catches a vapour barrier problem until a renovation opens the wall or a persistent musty smell forces the question.
Common mistakes on North Shore renovation sites
Punctures are the most frequent defect we find and the easiest to fix if caught before drywall goes back on. Electrical boxes, plumbing lines, and pot light housings all punch through the vapour barrier, and each hole is a place where warm moist air can bypass the barrier entirely and reach the cold cavity behind it. The fix is straightforward: acoustical sealant or purpose-made poly tape around every penetration, and vapour barrier-rated electrical boxes with a gasketed cover rather than a standard box with the poly just stapled around the edge and left torn.
Double vapour barriers are a mistake that comes from good intentions. A homeowner or a previous contractor adds foil-faced insulation board or a vapour-retarding paint on the interior, not realizing the wall already has polyethylene behind the drywall. Two vapour barriers in one assembly, especially with an air gap between them, can trap moisture between the two layers with no way for either side to dry out. Before adding any vapour-retarding product to an existing wall, find out what is already there.
Basement and below-grade walls get this backwards more often than any other part of a North Shore house. A basement wall has masonry or concrete on the outside, which is a very different assembly than a stud wall with exterior sheathing, and the moisture drive can run in more than one direction depending on the season and whether the foundation is damp. This is specialist work, and a vapour barrier detail copied from an above-grade wall onto a basement wall without adjustment is a common defect we correct on basement suite conversions.
Retrofitting insulation into a wall that already has drywall on it, without removing the drywall, is its own risk. Blown-in insulation added to a closed wall cavity that already has an intact vapour barrier can work fine, but adding insulation to a cavity with no existing vapour barrier at all, common in pre-1970s North Shore construction, changes the temperature profile inside the wall without adding the layer that is supposed to protect it.
- Seal every electrical box, pipe, and wire penetration through the vapour barrier with acoustical sealant or poly tape.
- Check what vapour control layer already exists before adding foil-faced insulation, vapour-retarding paint, or a second poly layer.
- Treat basement and below-grade walls as a different assembly, not a copy of an above-grade wall detail.
- Confirm whether an existing wall has any vapour barrier before blowing insulation into a closed cavity.
- Photograph the vapour barrier installation before it is covered, since it cannot be verified again without opening the wall.
What an inspector is checking for
A building inspector reviewing insulation and vapour barrier work on a North Shore renovation is checking three things: that a vapour barrier is present anywhere insulation is installed, that it sits on the correct side of the assembly, and that it forms a continuous, sealed layer rather than a sheet stapled up with gaps at the edges, seams, and penetrations.
This inspection happens before drywall closes the wall, which is why the sequencing matters on a renovation schedule. Once drywall is up, the vapour barrier cannot be inspected again without cutting it open, so a failed inspection at this stage means removing drywall that was just installed, not just a paperwork delay.
Seams between sheets of polyethylene need to lap over framing members, typically by at least 150 millimetres, and be sealed there rather than floating in the middle of a stud bay where there is nothing solid to compress the seal against. An inspector walking a job will look specifically at how seams are lapped and whether the sheet is stapled tight enough to seal against the framing, not just draped loosely across it.
What to do when an old wall has no vapour barrier at all
Houses built before the mid-1970s on the North Shore frequently have no vapour barrier at all behind the original plaster or drywall, because the requirement was less rigorous in earlier code editions and vapour barrier material was not yet standard practice on every job. Opening one of these walls during a renovation is routine, and it is also the best and often only opportunity to correct it properly, since re-opening a finished wall later specifically to add a vapour barrier is rarely worth the cost on its own.
The fix is not simply stapling poly over the old insulation and closing the wall. If the existing insulation is compressed, wet, or has settled, it needs to come out first, since a vapour barrier installed over damaged insulation just traps the existing problem in place. Where the sheathing shows signs of past condensation, staining, or soft wood, that needs addressing before anything new goes back in, the same principle that applies to an attic that gets new insulation over an active moisture problem.
On a wall being opened for any reason, whether it is a kitchen renovation, an electrical upgrade, or a window replacement that disturbs the surrounding wall, treat it as the opportunity to bring that section up to the current vapour barrier standard rather than restoring it to whatever was there before.
Sources
Frequently asked questions
Which side of the insulation does the vapour barrier go on in a North Shore house?
BC Building Code Article 9.25.4.2 requires the vapour barrier on the warm side of the point in the assembly where condensation would occur. On nearly every North Shore wall, that is the interior side, directly behind the drywall and in front of the insulation. Putting it on the exterior sheathing instead traps moisture on the cold side of the insulation, which is one of the most damaging mistakes we correct on renovation sites.
What permeance rating does a vapour barrier need to meet?
Article 9.25.4.2 requires a permeance not greater than 60 nanograms per pascal-second-square metre, tested using the desiccant method under ASTM E96. Standard 6 mil polyethylene sheet, the clear plastic film used behind drywall on almost every North Shore house, comfortably meets that standard, which is why it remains the default material.
Does every insulated wall need a vapour barrier?
Article 9.25.4.1 ties the vapour barrier requirement to assemblies that contain insulation. An uninsulated garage wall or an unheated outbuilding has no vapour barrier requirement, since there is no meaningful warm-to-cold temperature difference across it for the barrier to protect against. Any wall being insulated as part of a renovation needs the vapour barrier installed alongside it.
Why does the North Shore's climate make vapour barrier mistakes worse?
North Shore outdoor air carries higher humidity for more of the year than most Canadian climates get, and annual rainfall here runs higher than nearly any other major Canadian metro area. A wall assembly with a vapour barrier mistake rarely gets a long dry stretch to recover in. Moisture that starts condensing in a stud cavity in October can still be actively re-wetting that same cavity in April.
Can I add a vapour-retarding paint over my existing wall?
Only after confirming what is already behind the drywall. Adding a vapour-retarding paint or foil-faced board to a wall that already has polyethylene sheet installed creates two vapour barriers in one assembly, which can trap moisture between them with no way for either side to dry. This is a common well-intentioned mistake on North Shore renovations where the existing wall build-up was not checked first.
What happens if drywall goes up before the vapour barrier inspection?
The vapour barrier cannot be inspected once it is covered, so a building inspector who was not able to verify it before drywall closes the wall can require the drywall to be removed for inspection. On the North Shore, where inspections are booked in a sequence with other rough-in work, this can cost more schedule time than the inspection itself, which is why the vapour barrier goes on the schedule ahead of the drywall trade rather than assumed to pass.
Do basement walls follow the same vapour barrier rule as above-grade walls?
No. A basement wall has concrete or masonry against soil on the exterior side rather than sheathing and siding, and the moisture drive through that assembly behaves differently across the seasons. Copying an above-grade wall's vapour barrier detail directly onto a basement wall is a common defect we correct on basement suite conversions, and below-grade assemblies need their own design rather than a default.
My 1968 North Shore house has no vapour barrier at all behind the drywall. Is that a problem?
It reflects the construction standard of that era rather than a defect at the time it was built, but it is worth correcting whenever that wall is opened for any renovation reason. Any wall being opened for a kitchen renovation, an electrical upgrade, or a window replacement is the practical opportunity to bring that section up to the current vapour barrier standard, since reopening a finished wall later specifically to add one rarely pencils out on its own.
How do I seal a vapour barrier around an electrical box or pipe?
Every penetration through the poly, whether an electrical box, a plumbing line, or a wire, needs acoustical sealant or purpose-made vapour barrier tape around the opening so the barrier stays continuous. Vapour barrier-rated electrical boxes with a gasketed cover are the standard fix for outlets and switches, rather than a standard box with poly stapled loosely and torn around the edge.
Can insulation be blown into a closed wall that has no vapour barrier?
It can be done, but it changes the temperature profile inside the wall cavity without adding the layer meant to protect it, which raises the condensation risk in a coastal climate like the North Shore's. Before blowing insulation into any closed cavity, confirm whether a vapour barrier already exists in that wall, since that answer changes whether the retrofit is safe to do without opening the wall first.
How much does it cost to correct a vapour barrier problem found during a renovation?
Correcting a vapour barrier while a wall is already open for another reason, such as a kitchen renovation, typically adds $2 to $5 per square foot of wall for the material, sealant, and extra labour, since the wall is already exposed. Reopening a finished, undamaged wall specifically to fix the vapour barrier costs significantly more once drywall demolition and refinishing are added back in, which is why it is almost always done alongside other work rather than as a standalone project.
Related service
Home renovation
See how we handle home renovation projects across the North Shore.
Learn about home renovationWhere this applies
Related articles